Motion interface at a glance
The Motion interface is divided into several functional areas.
Project Browser
When you open Motion, the Project Browser appears. Use this window to create new projects or open existing projects.

For more information, see Create a new project.
Main workspace
After you open a project via the Project Browser, the main workspace appears. Use this window to build, modify, and preview your motion graphics projects. The main workspace is divided into several functional areas, described in detail below.

File Browser
The File Browser, located on the left side of the main workspace, displays all files on your computer and networked disks. Navigating the File Browser is similar to navigating a window in the Finder.
When you select a file in the File Browser, a visual preview appears in the top-left corner of the Motion workspace, along with the file’s metadata.

Library
The Library, located on the left side of the main workspace, contains effects, content, presets, behaviors, filters, and other elements available in Motion. You can expand the Library content by adding fonts, music, or photos, or by saving content and effects that you create in Motion.
When you select an item in the Library, a visual preview appears in the top-left corner of the Motion workspace. The preview area also contains text information for the selected item, such as a description of the behavior, filter, or generator.

Inspector
When you select an object in your Motion project—an image, video clip, or effect—its parameter controls become available in the Inspector, located on the left side of the main workspace, ready for adjustment.

There are four Inspector categories, each of which displays parameter controls for the selected object:
Properties Inspector: Contains controls for setting basic attributes of the selected object, such as position, scale, and blending.
Behaviors Inspector: Contains controls for adjusting attributes of behaviors—animation and simulation effects that you can apply to objects in your project.
Filters Inspector: Contains controls for adjusting attributes of filters—visual treatments that you can apply to objects in your project.
Object Inspector: Contains controls that vary depending on the type of object selected. The name of this Inspector is also context-sensitive, changing depending on the type of object selected, such as Camera, Text, or Shape.
Heads-up display (HUD)
The most commonly used Inspector controls are also available in the heads-up display (HUD), a floating window that you can show or hide. For more information, see Transform layers in the HUD. 
Project pane
The Project pane (located between the File Browser, Library, or Inspector and the Canvas) contains three lists, each of which provides access to a different aspect of your project:
Layers list: Displays the hierarchy of objects (groups, layers, cameras, lights, behaviors, filters, and so on) in your project.
Media list: Shows the files imported into your project.
Audio list: Provides access to, and control of, audio files in your project.
More than simple lists of items in a project, these panes let you organize key attributes of a motion graphics composition, including the stacking order of image layers, audio settings, and source media settings.

Canvas
The Canvas is the visual workspace where you modify and arrange objects in your composition. Adding layers and effects to your project is as simple as dragging them from the Library or File Browser to the Canvas. The composition in the Canvas is what will be output when you share a project.
The buttons centered at the bottom of the Canvas are transport controls. Use them to play your project and see how it looks over time.

Toolbar
You can access tools for editing and creating objects in the toolbar, located in the center of the Motion workspace. There are tools that transform objects in 2D or 3D space; tools that create text, shapes, and masks; buttons that add cameras, lights, generators, particle systems, and replicators; and pop-up menus that apply filters and behaviors to objects.

Timing pane
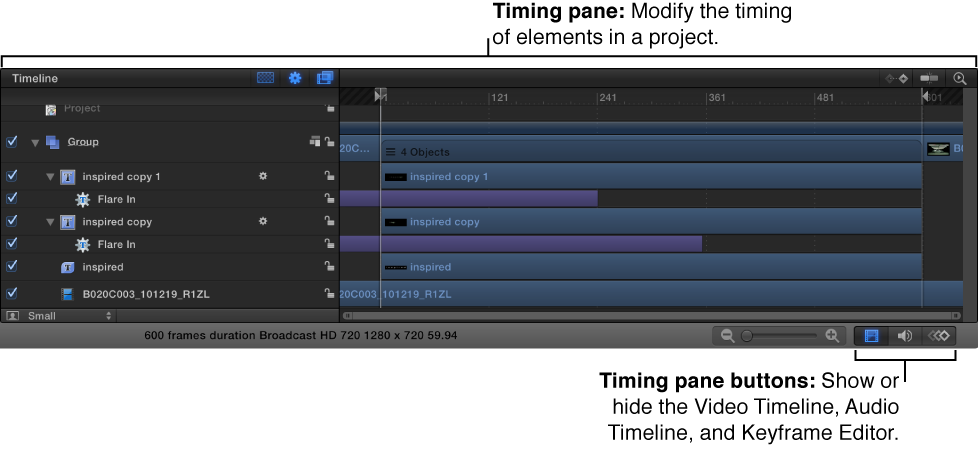
The Timing pane, located at the bottom of the Motion workspace, lets you view and modify the time component of a project’s contents. There are three panes that control a different timing aspect of a project:
Video Timeline: Provides an overview of objects in the project and how they’re laid out over time.
Audio Timeline: Provides an overview of audio components in the project and how they are laid out over time.
Keyframe Editor: Displays the animation curves for animated parameters and effects.
